Posted on: November 20, 2025 04:11 PM
Posted by: Renato
Categories: vue
Views: 110
Simplicidade de criar PWAs com o framework Quasar
Explore the simplicity and power of building PWAs with the Quasar framework.
Se você está aqui, provavelmente já conhece o Quasar, o robusto framework baseado em Vue.js. Mas, se não conhece, sem problema algum! Você está prestes a aprender algo novo.
Aqui estão alguns tipos de aplicações que podem ser criadas usando Quasar:
1. Progressive Web Apps (PWAs)
2. Single Page Applications (SPAs)
3. Aplicações Multiplataforma
4. Aplicações Mobile
5. Aplicações com Renderização no Servidor (SSR)
6. Aplicações Híbridas
Neste artigo, vou te guiar por como você pode aproveitar o Quasar para criar Progressive Web Apps de forma fácil e eficiente.
Vamos começar entendendo os motivos para escolher o Quasar em vez do Vue.js puro quando se trata de criar Progressive Web Applications (PWAs).
O Quasar oferece diversos recursos que tornam o desenvolvimento de PWAs mais simples e rápido, incluindo:
**Scaffolding:** O Quasar vem com um CLI que pode ser usado para gerar uma estrutura básica de projeto PWA, incluindo os arquivos de configuração necessários. Isso elimina a necessidade de configurar o projeto manualmente, economizando tempo e esforço.
**Componentes de UI:** O Quasar fornece uma ampla biblioteca de componentes de interface prontos, que podem ser usados para construir PWAs. Esses componentes são projetados para serem amigáveis em dispositivos móveis e fáceis de usar, reduzindo ainda mais o tempo de desenvolvimento.
**Geração de código:** O Quasar também inclui uma ferramenta de geração de código que pode criar trechos para funcionalidades comuns de PWAs, como rotas, serviços e diretivas. Isso diminui ainda mais a quantidade de código que os desenvolvedores precisam escrever manualmente.
**Integração de plugins:** O Quasar integra perfeitamente plugins e bibliotecas populares do Vue, como Vue Router, Vuex e Axios. Isso permite que os desenvolvedores utilizem essas ferramentas sem se preocupar com problemas de compatibilidade.
Por todos esses motivos, a configuração de PWA com Quasar é muito melhor do que uma PWA comum com Vue.js, em termos de desenvolvimento.
---
## Tutorial de PWA com Quasar para o **Blogify**
No Blogify, vamos integrar os principais recursos de PWAs usando Quasar, incluindo:
🏠 Instalação na Tela Inicial
🔄 Precaching
📊 Estratégias de Cache
🔄 Sincronização em Segundo Plano (Background Sync)
🔔 Notificações Push
Você vai aprender a transformar o Blogify — uma plataforma similar ao Medium — em uma Progressive Web App usando Quasar. Isso permitirá criar um site e um app com recursos empolgantes, semelhantes aos de aplicativos mobile nativos.
Mas espere: antes de começarmos a construir nossa obra-prima “Blogify”, vamos fazer um rápido tour de demonstração para ver o que vem pela frente.
Experience the live demonstration: Quasar-blogify.
If you’re all set, let’s dive into creating your “Blogify” masterpiece using Quasar v2, Firebase, Node, Express, and Vue 3! 🚀
Prerequisites:
Ensure Node is >=14 (or a newer LTS version) and NPM is >=6.14.12 or Yarn is >=1.21.1 installed on your machine.
Setting Up Your Project:
Let’s install Quasar using CLI and create a new Quasar Project:
npm i -g @quasar/cli
npm init quasar
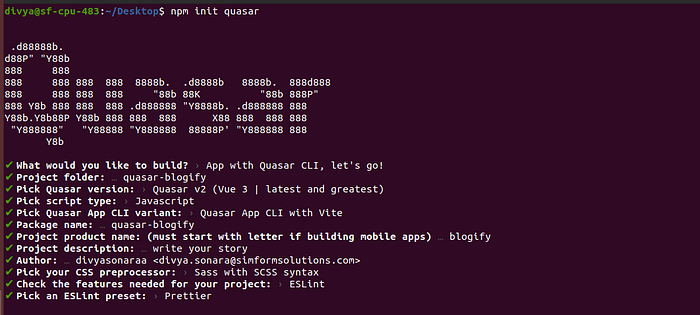
Once the project is created, execute the following commands:
cd quasar-blogify
 quasar dev # or: yarn quasar dev # or: npx quasar dev
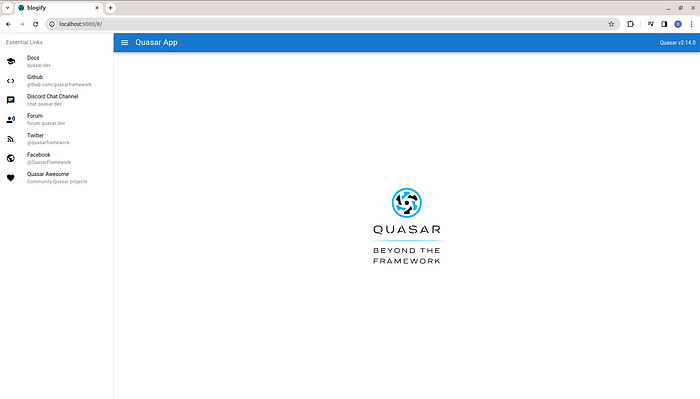
It will run the project, as shown below:
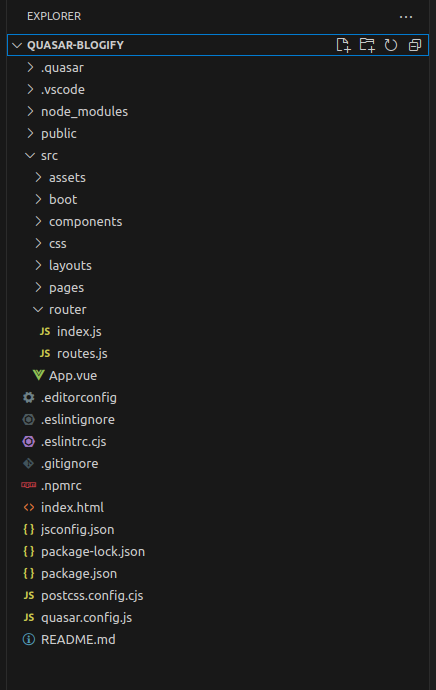
You can see the folder structure of the Quasar project below:
You can save development time by exploring my GitHub repository for PWA development. It’s packed with ready-to-use code for CRUD operations and essential Quasar features. Use it as your guide to speed up your progress.
GitHub Repository: Blogify
Create Layout, add pages, and create components.
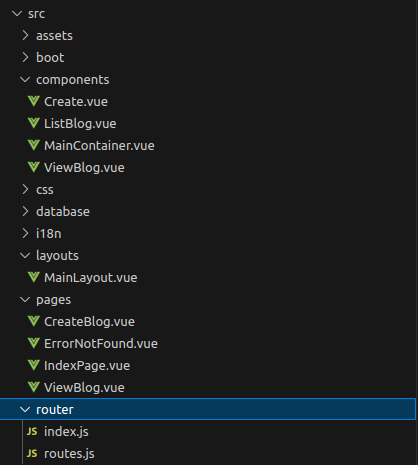
Once you’ve configured layout pages, components, and routing, the UI will appear as shown below (the card currently contains static data):
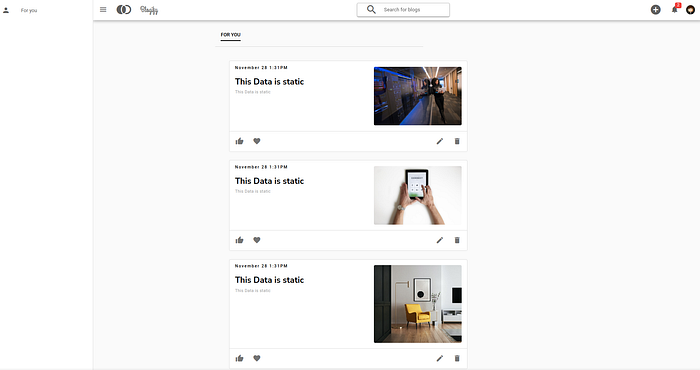
Following the establishment of the basic layout, let’s proceed to connect to the database and backend.
Create a Firebase project
- Create a new Firebase project called “Blogify” here.
Create a Cloud Firestore database
- Create a Cloud Firestore database (make sure you start in test mode).
- Add a collection named “blogs.”
- Add some dummy blog data.
- Each blog should have the fields id, title, content, liked, favorite, created_at.
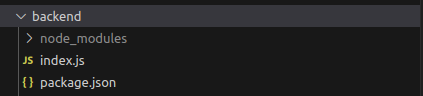
Setup a Node.js and Express backend
- Create a subfolder for your backend and initialize with npm in it.
- Install Express and Nodemon.
- Create an Express app with a simple GET endpoint that returns a string.
- Launch the app and make sure the endpoint works in the browser.
Get the app running
- Create a new project using the Firebase Console named Blogify (disable Google Analytics).
- On the Project Overview page, click on the Web icon below Get started by adding Firebase to your app.
- Name the app Blogify and click Register app.

- Click Continue to console.
- Click on 1 app > Settings icon > Service accounts.
- You may need to click Create Service account.
- Copy the
databaseURLfrom the code sample and paste it intobackend/index.jsin your project. - Save
index.js. - On Firebase Console — Click Generate new private key > Generate key.
- Save the JSON file to your
backendfolder and rename it toserviceAccountKey.json.
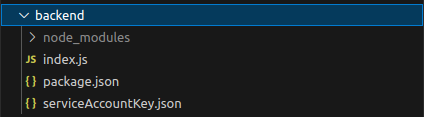
- On Firebase Console — Click Database > Create database > Start in test mode > Choose a location > Click Done.
The provided code in index.js initializes the Firebase Database and includes all the endpoints for our Blogify app.
- Install dependencies for both the app and server:
npm install
cd backend
npm install
- Launch the backend server:
cd backend
npm start
- Launch the app in PWA mode and ensure it’s working:
quasar dev -m pwa
Executing this command generates a src-pwa folder. We’ll explore it shortly and update custom-service-worker.js for our app.
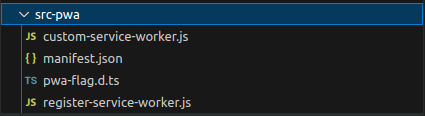
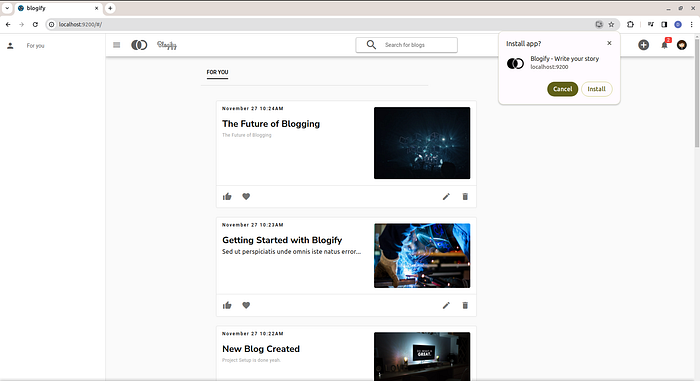
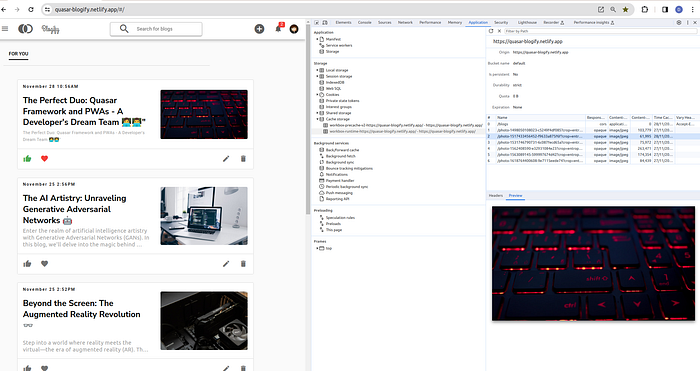
Our app is now running in PWA mode. A noticeable change is the installation icon in the address bar.
Every PWA requires a manifest file, a JSON file that informs the browser about how the app should be displayed. It includes details like titles, descriptions, colors, icons, and whether the app should be on full screen or retain some browser elements.
For a PWA without Quasar, we’d manually create the manifest JSON file and link it to our homepage using a tag like this.
<link rel="manifest" href="manifest.json" >
Quasar automatically generates and links the manifest.json file, eliminating the need for the above tag. View the manifest.json by opening http://localhost:9200/manifest.json while running your project.
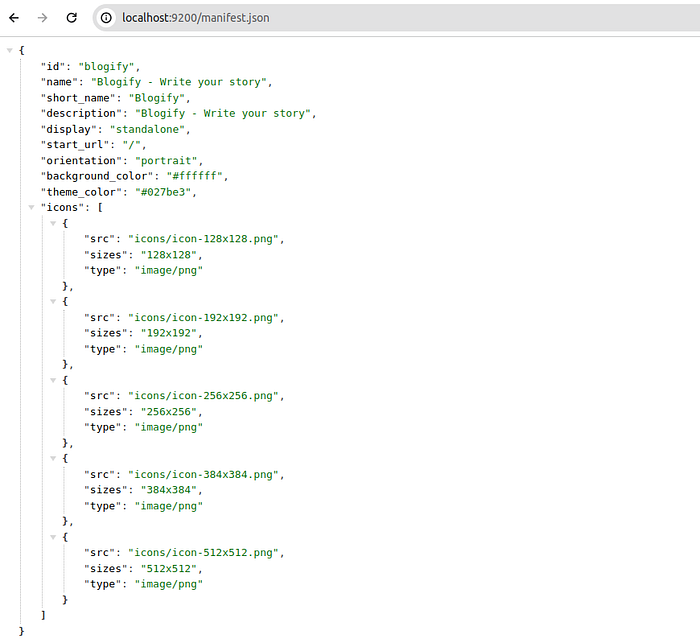
The manifest.json file includes details like name, orientation, and background color. Customize it for changes such as updating your app’s name.
1. Home screen installation 🏠
We’ll enhance our app by integrating a visually appealing banner for home screen installation. This banner will only appear on supported devices when the app is ready to install and users can choose to hide it if they find it annoying.
Get Divya Sonara’s stories in your inbox
Update your MainLayout.vuewith this piece of code:
```vue
<template>
Install Blogify?
</template>
```
MainLayout-script.vue hosted with ❤ by GitHub
<script setup>
import { useQuasar } from "quasar";
const showInsatllbanner = ref(false);
const $q = useQuasar();
let deferredPrompt;
onMounted(() => {
  let neverShowInstallBanner = $q.localStorage.getItem(
    "neverShowInstallBanner"
  );
  if (!neverShowInstallBanner) {
    window.addEventListener("beforeinstallprompt", (e) => {
      e.preventDefault();
      deferredPrompt = e;
      showInsatllbanner.value = true;
      setTimeout(() => {
        showInsatllbanner.value = true;
      }, 3000);
    });
  }
});
const installApp = () => {
  // Hide the app provided install promotion
  showInsatllbanner.value = false;
  // Show the install prompt
  deferredPrompt.prompt();
  // Wait for the user to respond to the prompt
  deferredPrompt.userChoice.then((choiceResult) => {
    if (choiceResult.outcome === "accepted") {
      neverShowAppInstallBanner();
    }
  });
};
const neverShowInstallAppBanner = () => {
  showInsatllbanner.value = false;
  $q.localStorage.set("neverShowInstallBanner", true);
};
</script>
MainLayout.vue hosted with ❤ by GitHub
Installation Banner Setup:
- showInstallBanner controls the display of the installation banner.
- deferredPrompt stores the installation prompt triggered by user interaction.
Banner Rendering:
- Renders the installation banner within the <q-footer> component.
- Provides options for the user to install the app (Yes), install later (Later), or never install it (Never).
Installation Handling:
- Calls the installApp() when the user clicks “Yes” in the banner.
- Hides the banner, prompts the user to install the app using deferredPrompt.prompt(), and waits for the user’s choice.
- If the user accepts the installation, call neverShowInstallAppBanner to set a flag indicating the user chose to install the app.
Never Show Banner Again:
- If the user clicks “Later” or “Never,” sets showInstallBanner to false.
- Stores a flag (`neverShowInstallBanner`) in local storage to ensure the installation banner is not shown again.
Time to execute:
2. Precaching 🔄
Precaching enables storing core HTML, Javascript, images, etc., in the user’s browser cache on the initial app run. This optimizes performance by loading resources from the cache rather than the network on subsequent visits and allows offline app launch.
Let’s integrate precaching into our app! In Quasar v2, it’s easier with the simplified setup in custom-service-worker.js. Quasar v2 automatically includes and preloads the `precacheAndRoute` method from Workbox, optimizing asset and route caching for improved PWA performance and offline capabilities.
To enable precaching in Quasar v2, just update quasar.config.js with:
pwa: {
 workboxPluginMode: 'InjectManifest'
}
Ensure to deploy your app on a platform for optimal results before proceeding.
Seeing the code in action:
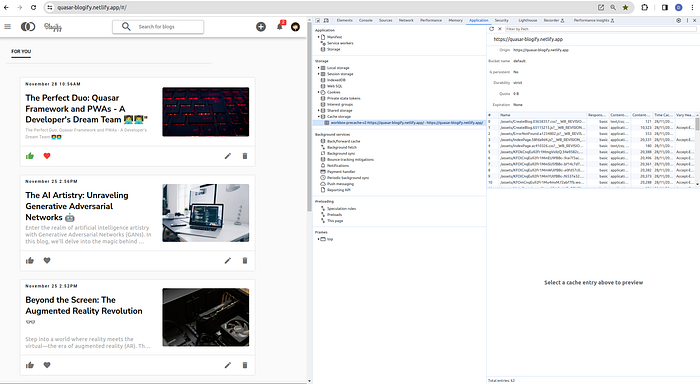
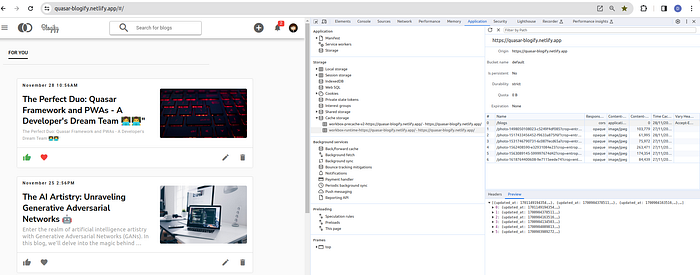
3. Caching strategies 📊
We’ll manage caching for our local requests, but what about external ones? Like images, fonts, or API calls from outside sources?
Let’s check out a few caching strategies and then implement them in our app.
Cache first, falling back to network
Utilize a cache first strategy for optimizing speed and enabling offline functionality, especially for requests like Google font files, which don’t change frequently. This approach ensures loading from the cache whenever possible, with a fallback to the network if the file is not in the cache.
Network first, falling back to cache
We use a network first strategy for our app's API requests to ensure we always fetch the latest information. The app prioritizes retrieving data from the network and falls back to the cache only if the network is unavailable or there's an API issue.
Stale-while-revalidate
Utilizing a strategy, our page leverages the service worker to retrieve cached requests for the browser. Simultaneously, the service worker checks the network for the same request, updating the cache with the latest data if available. This strategy is effective for non-critical requests where the latest data isn’t always necessary. We’ll implement this approach for all HTTP requests.
Let’s implement these strategies in our app by updating your custom service worker with the following code.
//Cache first, falling back to network
registerRoute(
  ({ url }) => url.host.startsWith("fonts.googleapi.com"),
  new CacheFirst({
    cacheName: "google-fonts",
    plugins: [
      new ExpirationPlugin({
        maxEntries: 30,
      }),
      new CacheableResponsePlugin({
        statuses: [0, 200],
      }),
    ],
  })
);

//Network first, falling back to cache
registerRoute(
  ({ url }) => url.pathname.startsWith("/blogs"),
  new NetworkFirst()
);

//Stale-while-revalidate
registerRoute(
  ({ url }) => url.protocol === "http:" || url.protocol === "https:",
  new StaleWhileRevalidate()
);
custom-service-worker.js hosted with ❤ by GitHub
Putting it to the test:

You may need to Clear Site Data, Close & Reload Chrome to see the output.
We have more caching strategies; to know about all of them, check these workbox strategies.
4. Background sync 🔄
Precaching and caching enhance app performance and enable offline launch, while background sync ensures full offline functionality. It keeps the app state synchronized even when the user is offline. Watch the video below for a demonstration of offline functionality.
Let’s implement this feature in our app.
- Set up a background sync queue for requests to our Create Blog endpoint. Update
custom-service-worker.js.
Note: You can detect for background sync support first if you like, by checking if
'sync'is in theself.registrationobject.
import { Queue } from "workbox-background-sync";

let backgroundSync = "sync" in self.registration ? true : false;

/*
   queue- create post
 */
let createBlogQueue = null;
if (backgroundSync) {
  createBlogQueue = new Queue("createBlogQueue", {
    onSync: async ({ queue }) => {
      console.log("queue", queue);
      let entry;
      while ((entry = await queue.shiftRequest())) {
        try {
          await fetch(entry.request);
          console.log("Replay successful for request", entry.request);
          const channel = new BroadcastChannel("sw-messages");
          channel.postMessage({ msg: "offline-post-uploaded" });
        } catch (error) {
          console.error("Replay failed for request", entry.request, error);

          // Put the entry back in the queue and re-throw the error:
          await queue.unshiftRequest(entry);
          throw error;
        }
      }
    },
  });
}

/*
  events - fetch
*/

if (backgroundSync) {
  self.addEventListener("fetch", (event) => {
    if (event.request.method == "POST") {
      // Clone the request to ensure it's safe to read when
      // adding to the Queue.
      if (!self.navigator.onLine) {
        const promiseChain = fetch(event.request.clone()).catch((err) => {
          return createBlogQueue.pushRequest({ request: event.request });
        });

        event.waitUntil(promiseChain);
      }
    }
  });
}
custom-service-worker.js
Redirect to the home page if the blog is created offline. For that, we need to check for offline status in createBlog() in Create.vue:
 if (!navigator.onLine && isBackgroundSyncSupported.value) {
      // Notify user about successful blog creation
      $q.notify({
        message: "Offline Blog Created Successfully!",
        type: "positive",
        timeout: 2000,
      });
      // Redirect to the home page
      router.push("/");
Now, it will be great if we grab the offline blogs that are stored in this queue in the indexedDB database.
To achieve this, we’ll utilize the idb Library. Install the library by executing the following command:
npm install idb --save
Enhance the code to display offline blogs in a list with an offline style:
<template>
    //rest of the code


      Stored offline


 //rest of the code
 </template>

  <script setup>
    import { ref, onMounted } from "vue";
    import {
      getBlogs,
      deleteBlog,
      addToFavoriteBlog,
      likeBlog,
    } from "src/services/ApiService";
    import { openDB } from "idb";
    import { useQuasar, date } from "quasar";
    import { useRouter } from "vue-router";
    const blogList = ref([]);
    const isLoading = ref(false);
    const $q = useQuasar();
    const router = useRouter();
    onMounted(async () => {
      getBlogList();
      listenForOfflinePostUploaded();
    });
    const getBlogList = async () => {
      isLoading.value = true;
      try {
        blogList.value = await getBlogs();
        isLoading.value = false;
        if (!navigator.onLine) {
          getOfflineBlogs();
        }
      } catch (error) {
        $q.notify({
          message: "Could not download blogs." + error,
          type: "negative",
          timeout: 2000,
        });
        isLoading.value = false;
      }
    };
    const getOfflineBlogs = async () => {
      let db = await openDB("workbox-background-sync");
      try {
        const failedRequests = await db.getAll("requests");
        for (const failedRequest of failedRequests) {
          if (failedRequest.queueName == "createBlogQueue") {
            let request = new Request(
              failedRequest.requestData.url,
              failedRequest.requestData
            );
            request.formData().then((formData) => {
              const offlineBlog = {
                id: formData.get("id"),
                title: formData.get("title"),
                content: formData.get("content"),
                liked: formData.get("liked"),
                favorite: formData.get("favorite"),
                created_at: formData.get("created_at"),
                updated_at: formData.get("updated_at"),
                offline: true,
              };
              blogList.value.unshift(offlineBlog);
            });
          }
        }
      } catch (error) {
        $q.notify({
          message: "Error fetching offline blogs" + error,
          type: "negative",
          timeout: 2000,
        });
      }
    };
    const listenForOfflinePostUploaded = () => {
      if ("serviceWorker" in navigator) {
        const channel = new BroadcastChannel("sw-messages");
        channel.addEventListener("message", (event) => {
          if (event.data.msg === "offline-post-uploaded") {
            const offlineBlogs = blogList.value.filter((blog) => blog.offline);
            if (offlineBlogs.length > 0) {
              const lastOfflineBlog = offlineBlogs[offlineBlogs.length - 1];
              lastOfflineBlog.offline = false;
            }
          }
        });
      }
    };
    //rest of the code
  </script>
ListBlog.vue hosted with ❤ by GitHub
Let’s see it in action:
5. Push notifications 🔔
To enable push notifications, there are several steps involved:
- User Permission
Ask users for permission to send push notifications via their browser.
Once granted, the browser is allowed to display native notifications on the user’s device.

Update the IndexPage.vueto see the above banner.
<template></template> <script setup> //imports import { ref, onMounted, computed } from "vue"; import BlogList from "src/components/ListBlog.vue"; import MainContainer from "src/components/MainContainer.vue"; import { useQuasar } from "quasar"; //variables const showNotificationsBanner = ref(false); const $q = useQuasar(); //lifecycle hooks onMounted(() => { initNotificationBanner(); }); //methods const initNotificationBanner = () => { let neverShowNotificationsBanner = $q.localStorage.getItem( "neverShowNotificationsBanner" ); if (!neverShowNotificationsBanner) { showNotificationsBanner.value = true; } }; const enableNotifications = () => { //will implement this in moment later console.log("result", result); }; const neverShowNotificationsBanner = () => { showNotificationsBanner.value = false; $q.localStorage.set("neverShowNotificationsBanner", true); }; //computed const pushNotificationsSupported = computed(() => { return "PushManager" in window ? true : false; }); </script>
2. Backend Setup
- Implement a backend system to manage push subscriptions and send push messages to the associated push servers.
Use the web-push library for subscriptions and notifications. Install it in the backend folder with this command:
npm install web-push --save
Generate keys by following the command:
web-push generate-vapid-keys
Update index.jswith the provided code for backend push notifications:
let webpush = require("web-push");


const publicKey =
  "Your-public-key";
const privateKey = "Your-private-key";

/*
  config - webpush
*/

webpush.setVapidDetails(
  "mailto:[email protected]",
  publicKey,
  privateKey
);

/*
endpoint- create post
*/
app.post("/blog", (request, response) => {
  response.set("Access-Control-Allow-Origin", "*");

  let uuid = UUID();
  let fields = {};
  let fileData = {};

  const bb = busboy({ headers: request.headers });
  bb.on("file", (name, file, info) => {
    const { filename, encoding, mimeType } = info;

    let filepath = path.join(os.tmpdir(), filename);
    file.pipe(fs.createWriteStream(filepath));
    fileData = { filepath, mimeType };
  });
  bb.on("field", (name, val, info) => {
    console.log(`Field [${name}]: value: %j`, val);
    fields[name] = val;
  });
  bb.on("close", () => {
    db.collection("blogs")
      .doc(fields.id)
      .set({
        id: fields.id,
        title: fields.title,
        content: fields.content,
        created_at: parseInt(fields.created_at),
        updated_at: parseInt(fields.created_at),
        image_url: fields.image_url,
        liked: fields.liked,
        favorite: fields.favorite,
      })
      .then(() => {
        sendPushNotification();
        response.send("blog added: " + fields.id);
      });
    function sendPushNotification() {
      let subscriptions = [];
      db.collection("subscriptions")
        .get()
        .then((snapshot) => {
          snapshot.forEach((doc) => {
            subscriptions.push(doc.data());
          });
          return subscriptions;
        })
        .then((subscriptions) => {
          subscriptions.forEach((subscription) => {
            const pushSubscription = {
              endpoint: subscription.endpoint,
              keys: {
                auth: subscription.keys.auth,
                p256dh: subscription.keys.p256dh,
              },
            };
            let pushContent = {
              title: "New Blog Created!",
              body: "New Blog Added! Check it out!",
              openUrl: "/#/",
            };
            let pushContentStringified = JSON.stringify(pushContent);
            try {
              webpush.sendNotification(
                pushSubscription,
                pushContentStringified
              );
              console.log("Notification Send");
            } catch (error) {
              console.error("Error sending push notification:", error);
            }
          });
        });
    }
  });

  request.pipe(bb);
});

/*
  endpoint - createSubscription
*/
app.post("/createSubscription", (request, response) => {
  response.set("Access-Control-Allow-Origin", "*");
  db.collection("subscriptions")
    .add(request.query)
    .then((docRef) => {
      response.send({
        message: "Subscription added!",
        postData: request.query,
      });
    });
});
backend\index.js hosted with ❤ by GitHub
3. Push Subscription
- Create a push subscription for each user, associating their browser with the relevant push notification server (e.g., Chrome or Firefox).
- Store subscription details, including unique keys and push server information, in a backend database.
Now with the new /createSubscription endpoint, let’s generate a subscription when the user grants notification permission. Update the script in IndexPage.vuewith the provided code.
<script setup>
//imports
import { ref, onMounted, computed } from "vue";
import BlogList from "src/components/ListBlog.vue";
import MainContainer from "src/components/MainContainer.vue";
import { useQuasar } from "quasar";
import { createSubscription } from "../services/ApiService";
import qs from "qs";
//variables
const showNotificationsBanner = ref(false);
const $q = useQuasar();
//lifecycle hooks
onMounted(() => {
  initNotificationBanner();
});
//methods
const initNotificationBanner = () => {
  let neverShowNotificationsBanner = $q.localStorage.getItem(
    "neverShowNotificationsBanner"
  );
  if (!neverShowNotificationsBanner) {
    showNotificationsBanner.value = true;
  }
};
const enableNotifications = () => {
  if (pushNotificationsSupported.value) {
    Notification.requestPermission((result) => {
      console.log("result", result);
      neverShowNotificationsBanner();
      if (result == "granted") {
        checkForExistingPushSubscription();
      }
    });
  }
};
const checkForExistingPushSubscription = () => {
  if (serviceWorkerSupported.value && pushNotificationsSupported.value) {
    let reg;
    navigator.serviceWorker.ready
      .then((swreg) => {
        reg = swreg;
        return swreg.pushManager.getSubscription();
      })
      .then((sub) => {
        if (!sub) {
          createPushSubscription(reg);
        }
      });
  }
};
const createPushSubscription = (reg) => {
  let vapidPublicKey =
    "Your-public-key";
  let vapidPublicKeyConverted = urlBase64ToUint8Array(vapidPublicKey);
  reg.pushManager
    .subscribe({
      applicationServerKey: vapidPublicKeyConverted,
      userVisibleOnly: true,
    })
    .then((newSub) => {
      console.log("newSub", newSub);
      let newSubData = newSub.toJSON(),
        newSubDataQS = qs.stringify(newSubData);
      return createSubscription(newSubDataQS);
    })
    .then((response) => {
      displayGrantedNotification();
    })
    .catch((err) => {
      console.log("err: ", err);
    });
};
const displayGrantedNotification = () => {
  if (serviceWorkerSupported.value && pushNotificationsSupported.value) {
    navigator.serviceWorker.ready.then((swreg) => {
      swreg.showNotification("You're subscribed to notifications!", {
        body: "Thanks for subscribing!",
        icon: "icons/icon-128x128.png",
        image: "icons/icon-128x128.png",
        badge: "icons/icon-128x128.png",
        dir: "ltr",
        lang: "en-US",
        vibrate: [100, 50, 200],
        tag: "confirm-notification",
        renotify: true,
      });
    });
  }
};
const urlBase64ToUint8Array = (base64String) => {
  const padding = "=".repeat((4 - (base64String.length % 4)) % 4);
  const base64 = (base64String + padding).replace(/-/g, "+").replace(/_/g, "/");
  const rawData = window.atob(base64);
  const outputArray = new Uint8Array(rawData.length);
  for (let i = 0; i < rawData.length; ++i) {
    outputArray[i] = rawData.charCodeAt(i);
  }
  return outputArray;
};
const neverShowNotificationsBanner = () => {
  showNotificationsBanner.value = false;
  $q.localStorage.set("neverShowNotificationsBanner", true);
};
//computed
const pushNotificationsSupported = computed(() => {
  return "PushManager" in window ? true : false;
});
const serviceWorkerSupported = computed(() => {
  return "serviceWorker" in navigator ? true : false;
});
</script>
4. Service Worker
- Use a service worker to listen for push events in the background, even if the app is closed.
- When a push event is received, display the notification to the user.
Add this code to custom-service-worker.js to track Push events and respond to user clicks on notifications.
/*
  events - push
*/

self.addEventListener("push", (event) => {
  if (event.data) {
    let data = JSON.parse(event.data.text());
    event.waitUntil(
      self.registration.showNotification(data.title, {
        body: data.body,
        icon: "icons/icon-128x128.png",
        badge: "icons/icon-128x128.png",
        data: {
          openUrl: data.openUrl,
        },
      })
    );
  }
});

/*
  events - notifications
*/

self.addEventListener("notificationclick", (event) => {
  let notification = event.notification;
  event.waitUntil(
    clients.matchAll().then((clis) => {
      let clientUsingApp = clis.find((cli) => {
        return cli.visibilityState === "visible";
      });
      if (clientUsingApp) {
        clientUsingApp.navigate(notification.data.openUrl);
        clientUsingApp.focus();
      } else {
        clients.openWindow(notification.data.openUrl);
      }
    })
  );
  notification.close();
});
Protect Subscriptions:
Secure push subscriptions with unique keys to ensure that only the authorized backend server can send messages to the user’s browser.
Fantastic! We’ve successfully set up push notifications and covered the way for exciting interactions with our users.
Now, let’s witness the magic in action! 📱💬
Wrapping up
As we finish up, remember that PWAs are cool because they can go beyond regular apps. With Quasar, you didn’t just make an app but created something flexible that works well on any device.
Keep having fun with your coding adventures, and may your PWAs stand out online!
Visit this link to learn about Quasar’s magic and how it can enhance your development experience.
- https://medium.com/simform-engineering/building-the-future-with-quasar-a-vue-js-framework-revolution-74b09723a91d
Donate to Site

Renato
Developer